Showing posts with label hairstyling. Show all posts

3.10.11

hair challenge day 12: the high ponytail

The High Ponytail.
Similar to the High Bun.
The high ponytail I decided to show
sans bangs.
You can use this same method of pinning your
bangs back when you do the High Bun.


Check in tomorrow to see a recap of ALL
12 days of the hair challenge
and vote for your favorite!

30.9.11

hair challenge day 11: how to wear your hair to the side

 How to wear your hair to the side?
I remember growing up in the 80's
and wearing a side ponytail almost daily.
Now that it's 2011 I still want a "side pony"
but may not be able to pull it off unless I'm wearing
leg warmers and Reebok high tops.

Here is a way to get that side do
without feeling the need to wear "jelly bracelets".


For extra credit:

29.9.11

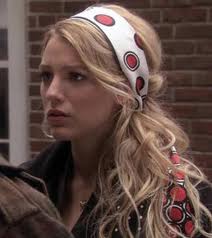
hair challenge day 10: how the wear a scarf in your hair


 How to wear a scarf in your hair day.
Every lady must own a silk scarf.
But what do you do with it?
Here are some of Mama Kat's scarf-in-hair ideas.
All you need is a scarf and a clear elastic.

Let's start with folding your scarf:


My fool proof way to get that scarf to stay in your hair
 is to NEVER tie the scarf in a knot,
but instead use a clear elastic to fasten the scarf together.
The elastic will keep the scarf in place tightly,
but gives and stretches so the scarf doesn't slip out of your hair.

 How to wear your hair in a ponytail and scarf:


 And just a little bonus,
if you don't like to wear your hair up,
here is how to wear it all down with scarf:


A few things to remember about
caring for your silk scarf:

*Only wear you scarf if your hair is relatively clean. 
 Dirty hair carries oil and product that are harmful to the silk.

*Dry Clean Only!

* Do not spray hair with hairspray once the scarf is in your hair,
do all your styling before you put it on your head.

* If your silk scarf is hand painted or dyed do not get it wet.

26.9.11

hair challenge day 8 - faux bob


The one thing I LOVE most about hair
is that it is a living thing.
Changing and growing.
So you haven't changed your hairstyle in awhile,
maybe never,
but this Faux Bob let's you try something
new with out having to commit to a new hair cut.

Here's how:


Cheesy smile not included,
 you must provide your own :)

24.9.11

hair challenge day 7: high bun


I love the High Bun.
It reminds me of a new sleek beehive.
It can be so glam and rocker at the same time.
This is another great style for 2nd or 3rd day hair
when it's a little dirty and greezy.
In fact, the dirtier the better for this one!

This is what you will need:


My hair was a little too short for this
so I actually clipped in one of my extensions at
the base of my ponytail.
 Keep your bun flat, round, and loose.
Avoid a tight ballerina bun or
an upside down ice cream cone.

Try this at least once.
It's young and fresh and SEXY!

22.9.11

hair challenge day 6: haute mess updo

 There really is no official name for this updo,
 but since I made it up
then I got to name it.
Haute Mess is exactly that.
You make a ratted mess of your hair
and it turns out looking haute couture.

This works great with curled or natural curly hair.
I've used this on brides and prom queens alike.
The more messy it is the edge-ier it looks,
and the more neat you make it the more glam it looks.
Grab a handful of Bobbi pins and
try it!

Here's how:

 (I'm using Big Sexy Hair's Spray and Play Harder
 with What a Tease)


 And there you have it,
one HOT Haute Mess :)

21.9.11

hair challenge day 5: knotted updo


 Day 5 comes to you a little late.
After eating an Advil bottle like it was candy,
I decided it was finally time to see a Chiropractor.
Thanks to Dr. Cho,
Day 5 has arrived.
Thanks to the LARGE knot (pun intended) in my back,
I  decided to show you my "go-to" knotted updo.
This is great for greezy hair days
and for looking a little fancy.


All you need is a brush, hairspray, and some Bobbi pins.

1- start by back combing the front of your hair, for a little body.

2 - divide your hair into four equal sections.

3 - take top two sections and tie a square knot
(right over left then left over right)
and secure it with a few Bobbi pins.


4 - take the bottom two sections and tie into a square knot
securing the knot with Bobbi pins.

5 - loop and pin down the remaining hair at the end of the knot,
or leave out for a messy look.

6 - use hairspray to secure any left over fly aways.


If your hair is longer then tie the knot one or two more
times before you pin it.

This updo is especially pretty when the hair has a  natural curl,
so if you have curly or wavy hair you can try this
instead of flat ironing your hair everyday.

7.7.11

kitsch style makeover: Sandra's mini-makeover


Meet Sandra!
This fab mommy won the "Get Fit"
fitness contess that was held by her Stroller Strides group.
As a prize she won a mini-makeover with me
and a photoshoot with Kamee June Photography.

Sandra recently lost a bunch of weight
and was looking to define her style and fit her new hot bod.
Sandra wasn't sure what her style was
but after talking about her love of comfortable flowing fabrics
 and certain celebrities styles that she admired
 we defined it as "Boho Chic".

Boho meaning Bohemian, earthy, hippie.
Chic meaning modern, refined, and sophisticated.


All the clothes we used are from Sandra's closet. 

After defining her STYLE,
I went through EVERY item in her closet
and made sure everything in there
 passed 2 important qualifications:

1- Does the FIT flatter her new figure?
2- Does the item fit into her newly defined STYLE?

This mini makeover didn't involve any shopping.
All the items in Sandra's closet ARE hers.
We re-purposed, re-organized, and re-did her entire closet.
Now everything she has in her closet is ready-to-wear. 

We put some looks together that surprised Sandra;
brown with red,
or using a neutral gray like instead of white,
or wearing a skirt/dress instead of jeans.

Here are some of the outfits we put together.


Sandra's Staples:
Basic tanks in white, brown, gray
Strappy cotton and lace camisoles
Gauzy skirts and dresses
Denim mini skirt
Linen flowy pants


Sandra's shopping list:
Denim jacket
White jeans
Dark skinny denim
Belts, scarves, shoes, jewelry or otherwise -
Accessories!!!


Like most clients I work with,
 Sandra desperately needed to accessorize!
I brought some jewelry and accessories
from home to prove my point.
As seen in the outfits above,
the accessory can make the outfit!

Sandra had PLENTY of clothes,
she just couldn't use them effectively.
Instead of going for a shirt with a crazy pattern
 try buying a necklace and bracelet 
that can add interest to many outfits.

Spend more money on quality clothing
that you can use for years
and save money buying less expensive accessories
that you can toss out after they become out of fashion.

Here is a shot from Sandra's photo shoot,
Isn't she FAB!?!


Thanks to Sandra for trusting me
and letting me plow through your closet!
Sandra is on strict orders to stop buying clothes
 and focus on her accessories,
throw out or alter all her capri's - urg!
And, keep putting herself at the top of her list.
1.5.11

play it proper...a couture bride


 Something happens to a girl when she lets her hair down.
I love a pristine updo like no body's business,
but there is something primal and unpredictable
 about letting all your hair down.
I love this shoot because there's two stories happening here;
hair up prim and proper, and hair down footloose and fancy free.

This post is the second part of Play it Proper.
Kalynne is our "couture" bride.
The "couture" bride designs a wedding to fit her fancy...
not the other way around.

I used MAC's Beauty Powder in Play it Proper for highlighting,
and I used Viva Glam V Lipstick and Lipglass for her lips.


Kalynne's dress was literally "couture".
I put it together with a puffy petticoat,
some tulle, a sash, a flower, and a shoestring.
Well, not really a shoestring, but you get the point.
The pearl bib necklace is mine,
and the siren stilettos belong to the model.


Big thanks to the talent of
for the beautiful images!
Thanks also goes to Kalynne our amazing model
and Rachel Claire Photo for the collaboration.

And that's a wrap!!!