Showing posts with label kat snip. Show all posts

3.10.11

hair challenge day 12: the high ponytail

The High Ponytail.
Similar to the High Bun.
The high ponytail I decided to show
sans bangs.
You can use this same method of pinning your
bangs back when you do the High Bun.


Check in tomorrow to see a recap of ALL
12 days of the hair challenge
and vote for your favorite!

30.9.11

hair challenge day 11: how to wear your hair to the side

 How to wear your hair to the side?
I remember growing up in the 80's
and wearing a side ponytail almost daily.
Now that it's 2011 I still want a "side pony"
but may not be able to pull it off unless I'm wearing
leg warmers and Reebok high tops.

Here is a way to get that side do
without feeling the need to wear "jelly bracelets".


For extra credit:

29.9.11

hair challenge day 10: how the wear a scarf in your hair


 How to wear a scarf in your hair day.
Every lady must own a silk scarf.
But what do you do with it?
Here are some of Mama Kat's scarf-in-hair ideas.
All you need is a scarf and a clear elastic.

Let's start with folding your scarf:


My fool proof way to get that scarf to stay in your hair
 is to NEVER tie the scarf in a knot,
but instead use a clear elastic to fasten the scarf together.
The elastic will keep the scarf in place tightly,
but gives and stretches so the scarf doesn't slip out of your hair.

 How to wear your hair in a ponytail and scarf:


 And just a little bonus,
if you don't like to wear your hair up,
here is how to wear it all down with scarf:


A few things to remember about
caring for your silk scarf:

*Only wear you scarf if your hair is relatively clean. 
 Dirty hair carries oil and product that are harmful to the silk.

*Dry Clean Only!

* Do not spray hair with hairspray once the scarf is in your hair,
do all your styling before you put it on your head.

* If your silk scarf is hand painted or dyed do not get it wet.

27.9.11

hair challenge day 9 - DIY peek-a-boo highlight

 Peek-a-boo highlights
that don't require a visit to the salon.
Be prepared to get a little crafty...

Here is what you will need:


 Pick a hair color that will contrast your natural color.
You can even find red, blue, purple, or pink!
Make sure that you are using REAL HUMAN hair.
All the supplies (clips, hair, weave thread)
 I purchased at Sally Beauty Supply.


26.9.11

hair challenge day 8 - faux bob


The one thing I LOVE most about hair
is that it is a living thing.
Changing and growing.
So you haven't changed your hairstyle in awhile,
maybe never,
but this Faux Bob let's you try something
new with out having to commit to a new hair cut.

Here's how:


Cheesy smile not included,
 you must provide your own :)

22.9.11

hair challenge day 6: haute mess updo

 There really is no official name for this updo,
 but since I made it up
then I got to name it.
Haute Mess is exactly that.
You make a ratted mess of your hair
and it turns out looking haute couture.

This works great with curled or natural curly hair.
I've used this on brides and prom queens alike.
The more messy it is the edge-ier it looks,
and the more neat you make it the more glam it looks.
Grab a handful of Bobbi pins and
try it!

Here's how:

 (I'm using Big Sexy Hair's Spray and Play Harder
 with What a Tease)


 And there you have it,
one HOT Haute Mess :)

21.9.11

hair challenge day 5: knotted updo


 Day 5 comes to you a little late.
After eating an Advil bottle like it was candy,
I decided it was finally time to see a Chiropractor.
Thanks to Dr. Cho,
Day 5 has arrived.
Thanks to the LARGE knot (pun intended) in my back,
I  decided to show you my "go-to" knotted updo.
This is great for greezy hair days
and for looking a little fancy.


All you need is a brush, hairspray, and some Bobbi pins.

1- start by back combing the front of your hair, for a little body.

2 - divide your hair into four equal sections.

3 - take top two sections and tie a square knot
(right over left then left over right)
and secure it with a few Bobbi pins.


4 - take the bottom two sections and tie into a square knot
securing the knot with Bobbi pins.

5 - loop and pin down the remaining hair at the end of the knot,
or leave out for a messy look.

6 - use hairspray to secure any left over fly aways.


If your hair is longer then tie the knot one or two more
times before you pin it.

This updo is especially pretty when the hair has a  natural curl,
so if you have curly or wavy hair you can try this
instead of flat ironing your hair everyday.
18.9.11

hair challenge day 4 - how to wear clip in hair extensions


It's Saturday night.
Girl's Night Out for Mama Kat.
So time to get fancy and get out my clip in hair extensions.

When using clip in extensions make sure the
hair is 100% REAL human hair.
This way you can curl, flat iron, blow dry it, and wash it.
Yes! Wash it!! They get dirty too.
Synthetic hair will easily melt with any contact to heat,
and beside, they're just fake looking.

 Here is what you will need:


Here's how to do it:


1 - Start with the clip on extension that is the shortest in width
 at the nape of the neck.
2 - Section off the area and clip in the hair piece
 on the hair below the part.
3+4 - Let down 1-2 inches of your natural hair
 and apply the next  hair piece. 
5 - Don't put the clip too close to your hairline
 so that it won't be visible.
-  Make sure you don't get hair from the upper section
 caught in the clips....
this can give you a major headache.
7 - For your third piece, make sure you have plenty of hair from your crown to sufficiently cover the hair piece.
8 - I like to back comb the top a little
 to camouflage the top extension.
9 - This is how it should look when you are done.
  The hair should fall like a waterfall.


Here are some suggested retailers for clip in hair extensions:


16.9.11

hair challenge day 3: how to do loose waves

How to get those loose beachy waves:


Wa-la! Beach waves.

 Some more helpful hints:

* use a 1inch curling iron if your hair is shoulder length or shorter,
use a 1 1/2-2inch iron if your hair is longer.
This way you maintain a LOOSE wave
and not the Shirley Temple ringlets.

* if your hair is curl resistant spray the sections
with a spritz hairspray before you curl them.
Spritz hairsprays generally have more hold,
or memory, and also they dampen the hair
allowing the cuticle's memory to reset temporarily.

* after you release the hair from the curling iron
pull down on the ends to keep the curl loose.

* if your hair is thick then pull the hair up around the
crown of your head and curl the bottom part first.
Then curl the top. 

Products used:

Big Sexy Hair Volumizing Dry Shampoo
Big Sexy Hair Spray and Play Harder hairspray
Osis Dust It
Paul Mitchell wide tooth comb
Hot Tools 1 1/2 inch marcel curling iron

15.9.11

hair challenge day 2: how to wear a headband


 I love wearing a headband.
Adds a little color and interest to your look.
I did two easy-peesy looks.
I'll start out slow and easy and
work up in degree of difficulty.

For the first look
make sure you have your bangs
and a little hair from your hairline
in front of the headband to keep
this look modern.

For the second look
keep the front hairline hair forward
and pull the rest back in your pony.
This is GREAT for greezy dirty hair!
Add some back comb in the crown
and summon your inner Jackie O.


And, yes, I am wearing my
Missoni dress from my recent Target
smash and grab.
Isn't it dreamy!?!

13.9.11

kat snips: HAIR Challenge


 Infamous hair.
"The Rachel"
Mullet: business in the front, party in the back.
We all have a signature look.

The other day while I was carrying the laundry
down to be washed my 3 year old saw me and asked,
 "Mom, why do you have CRAZY hair?"

You know the "MOM" look with  you bangs pinned back
and the rest in a mess on the top of your head.

I mean, I do hair.
Seriously!

I decided I needed to have a HAIR Challenge.
Yep, 12 days of new hair ideas.
Let's see if I can rid myself CRAZY hair :)

Here we go, DAY 1:

My usual "do".
I have naturally fine straight hair,
and this is after a round brush and
a lot of amplifying products.
Eh? We all wish we had someone esle's hair.
This is mine.
I don't color my hair
and I usually trim here and there by myself.
All and all, pretty low maintenance.

Note to self: enlist help with the camera.
Very difficult to photograph ones own hair...
maybe Hubby will need to learn to shoot in manual.


and that's DAY 1.

29.6.11

kat snip: what kind of FLAT IRON should I buy?

Hair and makeup by Kat
Photography by Kamee June

The most frequently asked question
 I get as a professional hairstylist is:
What kind of FLAT IRON should I buy?

This is a tricky question
that I usually respond to with:
How much MONEY do you wanna spend?

When buying a straightener there are a lot of choices out there
and they keep changing the labels and features.

Ceramic
Titanium
Infrared heat 
Vaporiron
Tourmaline
Thermal heat
Nano
Ionic

What does it all mean?!?


These terms are all used to describe the kind
of heat your flat iron is using.
Basically, Ceramic is the first step up from steal plates.
It protects the hair and adds shine.
Tourmaline reduced static and frizz.
 Infrared is a combo of ceramic and tourmaline heating.
It heats the hair from the core and seals the cuticle.
Heating from the hairs core leaves less damage
and tends to work and style faster.
Titanium plates have the highest heat.
They use Ionic heat and extremely high temperatures
resulting in a super straight and shiny finish.
The advantage of heating the hair this way
is once you straighten your hair you
 shouldn't have to straighten again till your next wash.
The high heat leaves a memory that keeps your hair
from getting puffy, frizzy, or wavy throughout the day.


So what are Mama Kat's recommendations?

Here's a few suggestions to get you out of the Target isle
and onto something worth spending your money on.

Cheap flat irons can be extremely damaging.
Save your hair and money by buying something quality,
that will last, and leave your hair shiny and healthy.


Hot Tools Ceramic iron is a great entry level flat iron.  
The ceramic protects the hair and Hot Tools brings the heat. 
This iron will get much hotter than Target's Revlons and Conairs.
The best part, it usually cost around $40.
Great for fine hair and younger girls
who tend to OVER use their heat tools.


Next level up is BaByliss flat irons.
They Nano Titanium has a temperature
 dial that reaches 450 degrees.
Usually sold between $89-120.
BaByliss has a GREAT quality track record too!
Great for medium fine to coarse hair
or curly textured hair.

My favorite flat iron, that I use in the salon,
and the Hairstylists top pick is the Croc.
Titanium plates, 450 degree temp, and very sleek
small body that allows you to get really close to the scalp.
I work in a multi-racial salon and even our African American
 stylist use this iron on their clients extra curly textured hair.
It's the iron recommended to stylist for properly performing
a Keratin smoothing treatment.
Costs between $150-200.


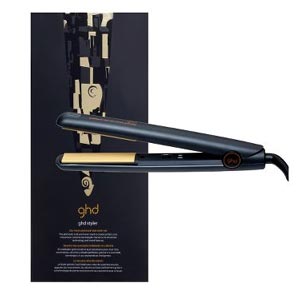
Two hot new flat irons that are quickly gaining popularity are the
FHI Heat and the GHD.
I haven't used them personally,
but am really interested in both!


I'm not usually one to bag on brands
but I typically steer people clear of two brands
that are unreliable and have many electrical glitches.
HAI and CHI.
Just sayin'.

Comment here if you have any questions for Mama Kat.
Happy to help :)